
What is a Car Rig and what rig will support our Movi Pro?
A Car Rig is a set of components used to mount a camera and/or motion stabilizer to a car for the purpose of shooting subjects inside of a car, outside of a car, or both. Car Rigs vary in complexity from a simple Suction Cup with a Ball Mount to very advanced systems used in movies like Children of Men.
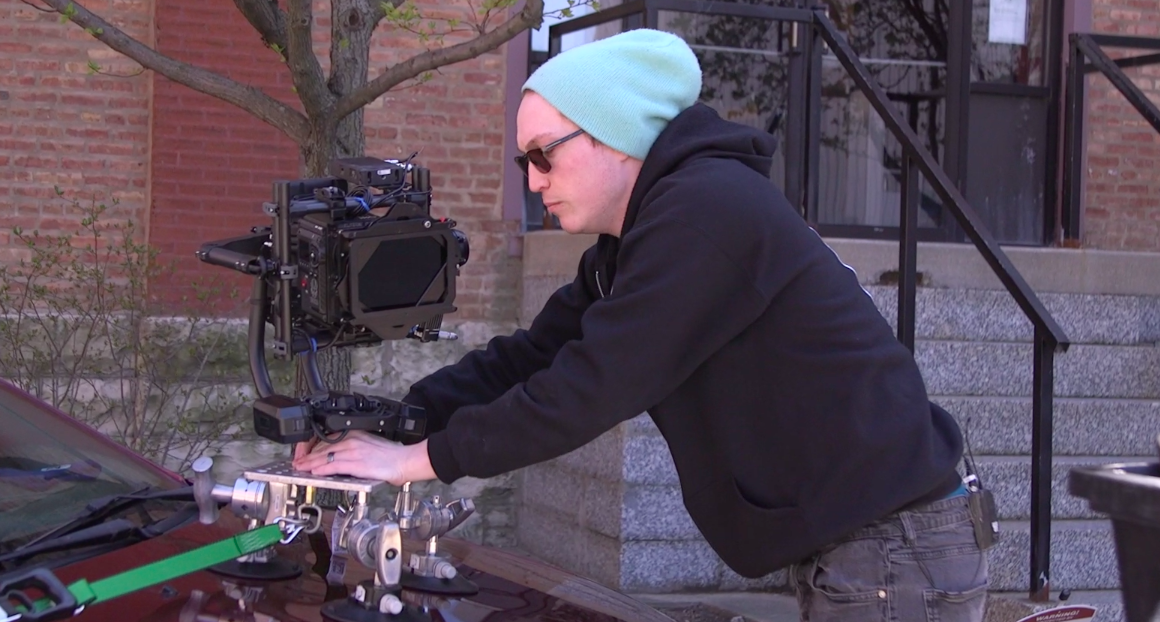
We are using a simple car rig called the Matthews Car Mount System to secure the Movi Pro build we prepped in our Movi Pro Red Camera Build Step-by-Step blog post.
Check out the video in that post and the step-by-step build process if you haven’t yet. We are also using the Freefly Ninja Star Plate Adapter to attach and secure the Movi Pro to the car mount system. Our Ninja Star has a male quick release adapter, traditionally called a “toad in the hole”, to connect the Ninja Star to the Movi Pro. The car rig is being constructed so that it is a “universal car rig”. A universal car rig is capable of shooting subjects inside the car, or subjects outside of the car.
How Do We Construct the Car Rig?
- Clean the surface of the car so that when the car mount is attached debris will not interfere with the suction cups securing. (01:04)
- Thread the baby spuds to the suction cup mounts. (01:37)
- Position the suction cup mounts on the car to gage where you will be placing the mounts. (02:21)
- Insert the ⅜” flathead screws into the beveled holes of the cheeseplate. (03:55)
- Thread a baby spud into each ⅜” flathead screw and tighten them down with an allen key. (04:16)
- Insert a ⅜” flathead screw into the center of the cheeseplate. (05:04)
- Thread the Freefly Ninja Star to the ⅜” flathead screw. (05:13)
- Align two of the ¼-20 holes of the Freefly Ninja Star over holes on the cheeseplate. (05:30)
- Thread two ¼-20 mounting screws through the cheeseplate into the Ninja Start for extra security. (05:38)
- Tighten the ¼-20 screws with a flathead screwdriver, and the socket cap screw with an allen key.
- Insert a ⅜” flathead screw into each of the beveled holes on the short sides of the cheeseplate. (06:07)
- Thread the ratchet strap hooks to the ⅜” flathead screws and tighten them down with an allen key.
- Attach a grip head (aka “knuckle”) to each baby spud attached to the cheeseplate. (06:57)
- Insert the baby spud attached to a suction cup mount into each grip head. (07:53)
- Place the built car mount system where you would like it positioned on the car. (08:28)
- Loosen the grip heads to place the suction cups flush to the car. (08:34)
- Secure each suction cup to the car, and retighten each grip head. (08:44)
- Reposition the cheeseplate and relock the grip heads as needed. (10:22)
- Attach the hook at either end of both ratchet straps to the hooks on the cheeseplate. (10:43)
- Run the long strap (the one without the ratchet) underneath the car. Make sure the strap is not positioned in your wheel well. (11:43)
- Feed the strap into the ratchet and tighten the strap. (12:18)
- Double check that all of your thumbknobs are fully tightened on each grip head of the car mount system. (13:14)
How Do We Secure the Movi Pro to the Car Rig?
- Retrieve your Movi Pro build and connect the “toad in the hole” adapter to the Freefly Ninja Star on the car mount. (13:58)
- Position and lock down the Movi Pro. (14:07)
- Double check the fine tune balance of the Movi Pro. (14:35)
- Power on the Movi Pro, and confirm which direction the Movi Pro orients. (15:48)
- Turn the Movi Pro off, and reposition the “toad in the hole” to orient the Movi Pro to face the front of the car. (16:12)
- Power on the Movi Pro.
- Auto Tune the Movi Pro from the Freefly app in your smartphone, or auto tune it from the Control Unit if you have access to it. (16:44)
- Calibrate the Bush Pilot focus motor with the Mimic Control Unit. (18:29)
- Power on the SmallHD Monitor on the Mimic controller.
- Boot up the camera and make sure the Teradek transmitter is turned on.
- Switch the mode in the Mimic Control Unit to “Mimic”. (23:03)
- Use “Pan Adjust” in the Mimic Control Unit to adjust the control position of the Mimic controller relative to the Movi Pro. (23:29)
Want to start your own stream?
0 Comments