What is Live Streaming?
Live streaming is online, real-time broadcasting of video and/or audio. Broadcasting is certainly not new to the internet; nor is real-time broadcasting. Real-time broadcasting, also known as “Live Television” has existed for decades in the form of newscasts, sporting events, awards shows, morning shows, and other forms. What has changed is the delivery infrastructure and the end devices that receive the media. These changes developed over the course of the last three decades, and have made considerable strides in the last decade. We are at a point now where we conduct real-time broadcasts with our smartphones, delivering live video via the internet and social media platforms to anyone with a smartphone, computer, or internet connected television. The extremely complex infrastructure of the internet has made this process extremely easy for anyone. But what if you want to use a camera with better resolution than your phone? What if you want to use multiple cameras that are all simultaneously streaming live? There are many different options out there. We have identified our own, cost effective solutions for single and multi-camera setups.
Single Camera Live Streaming
One can use any camera for live streaming as long as it can output an HDMI or SDI video signal. It is preferable to use a camera that outputs a “clean” video signal. A “clean” video signal is a signal that outputs video that is not displaying menu or screen data. Most cameras have a menu setting that allows you to choose whether or not you want this data to output. If you are using a camera without this feature, then you should consider using a different camera.
What equipment is needed to do single camera live streaming?
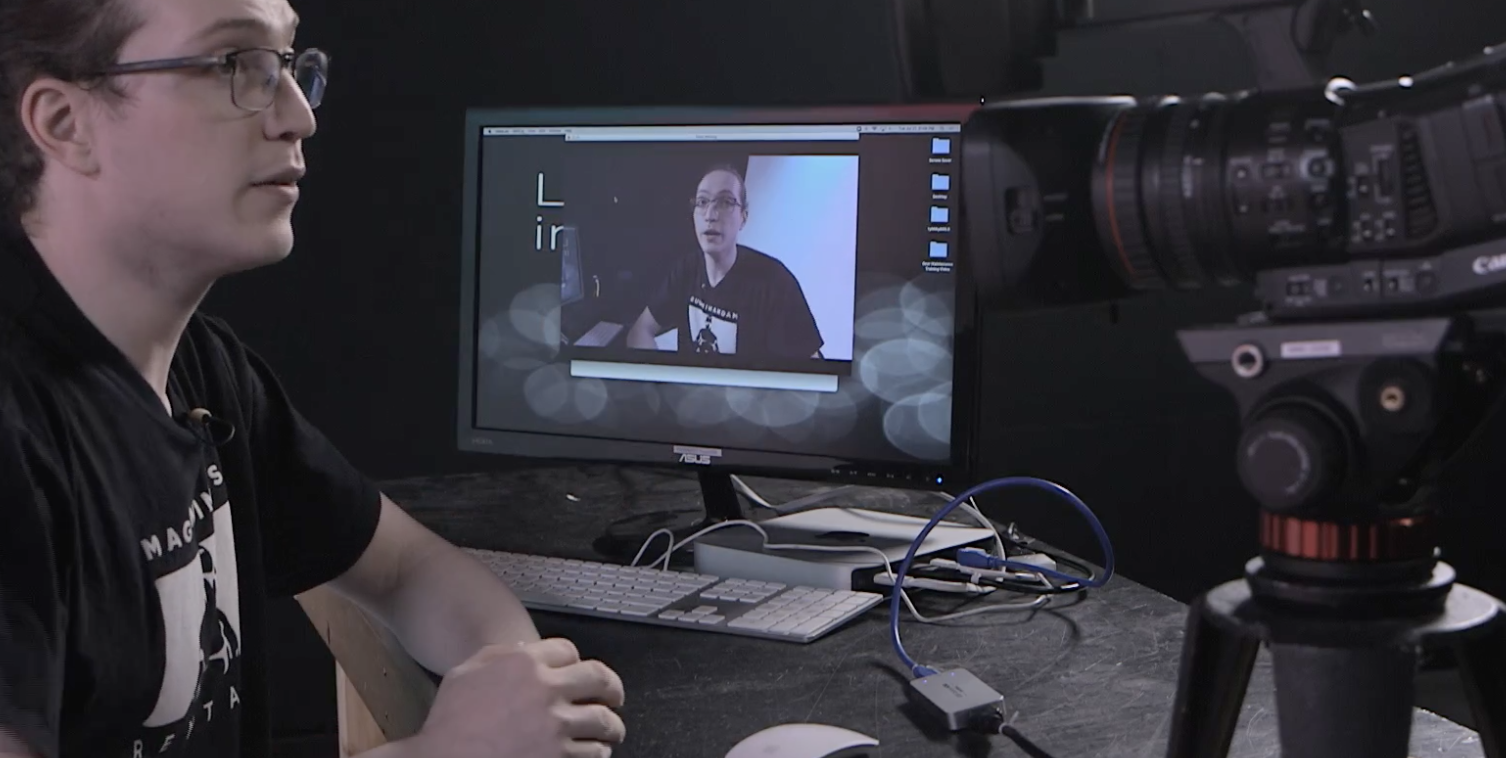
In our single camera live streaming setup we are using a Canon EOS 5D Mark IV EF DSLR Camera with a Canon EF 24-105mm f/4L IS Zoom Lens. Since we are using a DSLR, we are also using a Rode Videomic Pro for audio. We also recommend using a Sennheiser Wireless Lav Kit. The camera is mounted to a Sachtler Ace M Fluid Head, and a Hi-Hat.
We are also using the Blackmagic Ultra Studio Mini Recorder. This device is an interface that converts the video signal from the camera to a data signal for the software application to stream the video. You will need an HDMI to HDMI Mini Cable to connect your camera to the interface, and a Thunderbolt Cable to connect the interface to a MAC computer. This device will only connect to computers with a thunderbolt port.
What software is needed for live streaming?
You will need to download software applications as well to live stream your video. The first application you need is Blackmagic Desktop Video. You will need this software to view the received signal from the Blackmagic Ultra Studio Mini Recorder. In addition, we recommend using OBS Studio, and Restream. OBS Studio is free, open source video broadcasting software that works for Windows and MAC. This powerful application allows you to send live video streams, record your live streams, mix multiple audio sources, and switch from multiple media sources such as pre-recorded intros and outros for your live stream. Restream is a multi-streaming service that allows you to simultaneously stream your production on multiple platforms such as Facebook, YouTube, and Periscope.
How does one setup a single-camera live stream?
We recommend a particular “order of operations” when setting up your live stream. The “order of operations” is the order in which you connect and power all of your devices. We recommend the following order:
- Build your camera setup and power it on.
- Adjust your camera’s video output settings. You will need to make sure your camera is set to output from the correct port (typically HDMI or SDI), and that your output format, namely your frame rate, is properly set.
- If you are using a DSLR, then make sure the “AUTO-OFF” setting is turned off, as you do not want the camera to turn off in the middle of your live stream.
- Mount your lens to the camera.
- Adjust your exposure settings to make sure the image looks as you would like it to display in your stream.
- Make sure your computer is turned on.
- Connect the Blackmagic Ultra Studio Mini-Recorder to the computer.
- Open the Blackmagic Desktop Video software.
- Adjust the “Input Setting” in the software. In this case, since we are using a DSLR with an HDMI output, we will select “HDMI” as the input setting.
- Confirm “Blackmagic UltraStudio Mini-Recorder” is recognized by the software.
- Connect your camera to the Mini-Recorder with appropriate cable.
- Open the OBS Studio software.
- Turn the setting “Studio Mode” on to see the Preview and Program video windows.
- Select the “Source” drop down and select “Blackmagic Device” as your video source.
- Select the “Device” drop down and select “UltraStudio Mini Recorder”.
- Select the “Video Connection” drop down and select “HDMI”.
- Select the “Mode” drop down, and select “1080p23.98”
- Make sure “Audio Connection” is set to “Embedded”.
- Select the “Settings” button in the bottom right corner of the OBS Studio window, and on the “General” page, adjust whatever settings you prefer.
- If you would like to record the stream, then check “Automatically record when streaming”.
- Select the “Video” page, and set the “Base (Canvas) Resolution” and the “Output (Scaled) Resolution” to “1920×1080”.
- Set to the “Common FPS Value” to “NTSC”. (if you are in North America)
- Select the “Stream” page and select your “Service”. In our case, we select “Restream.io – RTMP”, and copy the “Stream Key” given to us by Restream.
- Connect the audio device to the camera.
- Make sure the embedded audio signal levels are seen in OBS Studio.
- Adjust audio levels as needed in OBS Studio or in camera.
What is needed to do a multi-camera live stream?
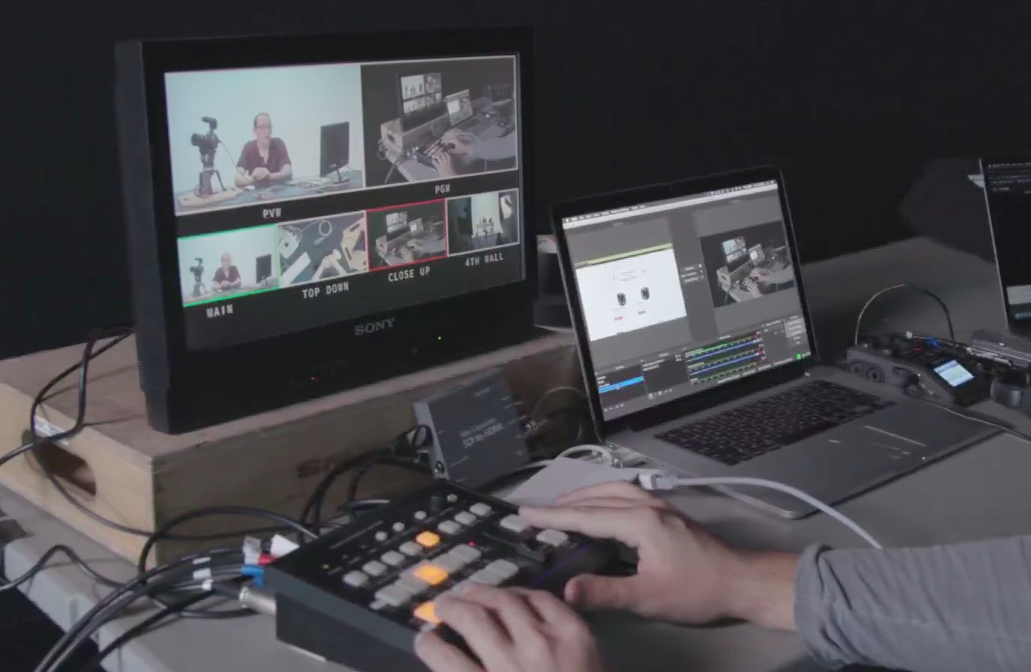
We recommend using cameras with an SDI output if you plan to use our multi-camera live streaming setup. The reason we recommend SDI outputs is because in order to stream multiple cameras you will need a switcher, and our Panasonic AWHS50N Compact Live Switcher has multiple SDI inputs. Our multi-camera setup utilizes five Canon C200s, but any camera with an SDI output should work. Mike recommends a Canon XF705 4K Camcorder because of its integrated zoom lens, XLR inputs, internal recording capabilities, and its ease of use. You will also need a production monitor to see all of your video signals. We are using a Sony LMD-B170 17″ Monitor. In addition to the cameras, switcher, and monitor, we recommend using a separate audio interface to connect to your software in order to maintain consistent audio quality as you switch from camera to camera during your stream. We are using a Zoom H6 Field Recorder as our audio interface.
How does one setup a multi-camera live stream?
You would follow the same order of operations as the single camera setup; however, the camera setup is more involved, and you will want to make sure your additional audio interface is setup properly. In between the streaming interface and your cameras, you will have a physical switcher. The physical switcher may have 4 or 5 cameras inputting the video signals into the switcher, but our Panasonic AWHS50N Compact Live Switcher has only two SDI outputs. One of these outputs is connected to the Sony LMD-B170 17″ Monitor so that you can view all of your video signals and control the switcher. The other output is connected to your streaming interface. In the video, Mike is demonstrating the Blackmagic UltraStudio Mini Recorder. In our multi-camera streaming setup we are using the Blackmagic Intensity Shuttle. Once everything is connected you are essentially using the switcher as your live stream’s video source. As far as the software is concerned, there is only one video source, and that is whatever video signal is being transmitted from the switcher.
Setting Up Your Audio for Multi-Camera Live Streaming
If you are using a Zoom H6 Field Recorder, then connect a USB 2.0 Cable to the recorder, and the other end into your computer. Once you have powered on the recorder, you will follow these steps:
- Once the interface is powered on, you will be in USB Mode, and you can select how you want to use the device. Select “Audio interface”.
- Once “Audio Interface” is selected, you will choose how you want to use it. Select “Stereo Mix”.
- Select “PC/MAC”.
- Connect an audio device, such as a Receiver for a Wireless Lav Kit, into an XLR input of the audio interface.
- Go to the OBS Studio software and mute other audio inputs in the “Audio Mixer”.
- Select “Source” in the OBS Studio window.
- Select “Audio Input Capture”.
- Name the source whatever you wish.
- Select the “Device” window and then select “H6” as source.
- Resend the signal by selecting the “Preview” image and then selecting “Transition”.
- Once it refreshes, you can scroll down in the “Audio Mixer” and find the new source.
- Test the audio levels and you are good to go.
Adding an Intro and Outro to Your Live Stream
The OBS Studio software can serve as your live stream’s switcher. By adding an additional “scene” to OBS Studio, you can use the software to start your stream with a video file that you have stored on your laptop. Then you can switch to the main video source or camera you are using for your live stream. To set this up just follow these simple steps:
- Open OBS Studio
- Select the “+” button under “Scene”.
- Name the new scene.
- Select the “+” button under “Source”.
- Select “Media Source”
- Name the media source
- Browse your local computer files to find the file.
You can also simply fade in from black by selecting “Color Source” instead of “Media Source”. You will name this as well, and select your color. At this point, your “Preview” window will appear as the color you selected.
0 Comments