Most of us had some time on our hands during April of 2020, and at Magnanimous, we made that time as productive as possible. We live streamed every day for one month straight, recorded those streams, and we created a series of blog posts to reference them. We learned a lot about live streaming as well as other processes. We also used the time to create some fun promos. One of those promos is a stop-motion shipping service promo. We recently revamped our shipping prices, so I wanted to find a fun way to get the word out about the service and the new pricing.
Stop-Motion Video, Why?
Well, it’s fun and quirky. Given the tough times we have all faced throughout 2020, I wanted to make something light hearted and a little cartoony. We made a more serious promo for our ‘Life in Focus’ campaign, but for this campaign I wanted to keep it fun. Stop-motion offers a unique production process and an odd style of motion that draws the eye in. There are three things I always keep in mind when directing any type of video. The eye is naturally drawn to three things: light, faces, and motion. Stop-motion is a little strange and dreamy, and a great way to catch a viewers attention.
We approached the production of this promo as a team. We had a four person crew, so the production responsibilities were divided amongst us. It is my opinion that for any director, on any project, the most important directorial decision one makes, is picking the right people to do the work. That applies to cast and crew. You have to rely on them to do what they do well. So other than picking a script or a project to work on, picking the right team is of the upmost importance. Mike and Doug would be our production crew shooting and lighting the project. Sean would do set design, construction, and art direction, and I would direct as well as do a bit of gaffing. I had to shake off some cobwebs for that bit.
Our crew was in place, so we proceeded through the normal production process: Pre-Production, Production, and Post-Production. Since the project was a stop-motion piece, planning it out was absolutely crucial. Stop-Motion capture is a VERY time consuming process. If we made a mistake during production, it would take even more time to go back and fix it. Production was meticulously planned, and our pre-production planning and testing lent some great insights into the process and the best ways to work. It was a time consuming process that yielded some great results. Post-Production included collecting all of the images and sending it to the editor who had to compile them into a timeline and also do a bit of photoshopping. The final product came together with the efforts of every member of the crew and it all jelled together quite nicely.

Cameras, Lenses, Lights, Media, Monitors, and Much More.
Pre-Production
During pre-production, I brought the initial concept to the table and Mike immediately mentioned that we should do a quick screen test to start to work out what was required from the animation process. The test went well, and we were able to gauge what was needed for smooth motion and for more chunky-motion. It became very clear that we needed to shoot this project in our studio.
The light in our prep area, where we conducted our tests, changed throughout the day; therefore, the light in our stop-motion test shots was different. Due to the condensing of time through the stop-motion process, if one is not mindful of all the elements involved, one might also inadvertently create a time-lapse while creating a stop-motion video. In our second production meeting, Sean requested story boards, noting that they would be helpful to delimit what would be needed for set design and for achieving the shot.
I drew some simple boards that outlined the concept and what I expected to see. I also introduced the set concept: a package being delivered to a house. The house wouldn’t aim for realism, but rather a cartoonish style that lended it to more simple construction. Limiting our self to the tools and resources that we already had in-house was also a priority. We had a variety of paper backdrops already in-house and some lumber that was left-over from past projects, so we had our materials. After some discussions with Sean, we roughed out a simple design for a front yard and house, and a super simplified interior. Sean would construct the set he designed, and I did a rough walk thru of our Studio with Doug.
We discussed our general lighting approach which included a general idea of what we were thinking, and where lights should be placed up in the grid, but we did not discuss any specific lighting queues or looks. I began to develop a concept of what the lighting would look like and where lights should live. Mike and Doug then began to brainstorm on the best rig to utilize for this particular project. They considered a lot of variations: a Dana Dolly hanging from the grid, Dana Dolly with a Jib on it, and finally, they landed on the Doorway Dolly with a the Kessler Pocket Jib low mounted to it with the Canon 5D Mark IV under slung. This setup gave us maximum versatility with the least potential destruction to our delicate paper set. Pre-lighting was done in one day. I hung a mixture of Arri Skypanels, Kino Flo Celebs, and Aadyntech lights up in our grid. These high output low-draw LED lights were a great open for us and really allowed us to dial in our color temperature and a little bit of RGB flavor. The back of our rentals shop served as a make shift construction shop for the set, cutting wood and forming paper, after about five days of set construction.
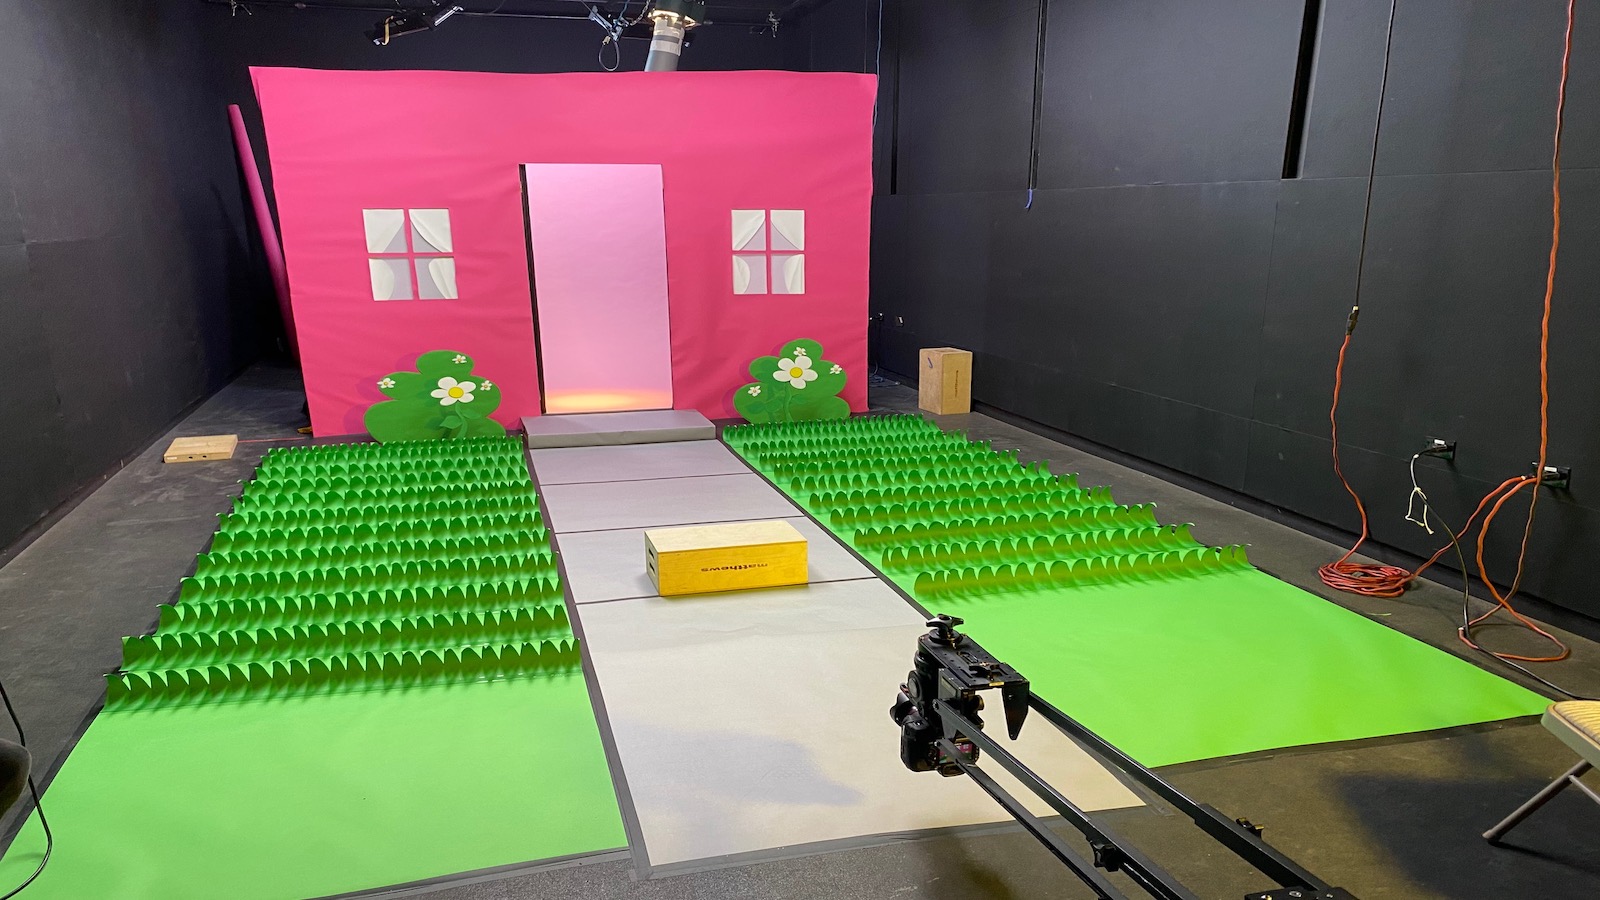
I took a whole Sunday to pre-light and organized the lighting based on what Doug and I discussed by mounting the lights where they generally needed to be. Sean and I discussed the set, specifically where it roughly lined up in the studio, so I organized the lights for what would be the exterior and the interior of the house. In our pre-production discussions, we mentioned wanting to use a little color to add some more punch to the grass or the interior of the house, so I selected the Arri Skypanels as our main sources, and filled in around those with the Kino Flo Celebs. Once the lighting was up, Sean began to move in the set to finish building it out: first with frames for the house made of scrap wood, cardboard, and pink backdrop paper. We used some chroma green paper backdrop for the grassy front yard, and it all came together with grey paper for the sidewalk and black paper for the door, as well as some flowers and bushes for good measure. Once the bulk of the set was in place Doug and Mike did a more focused lighting setup. Doug ended up hanging a large 8×8 silk and put some green gels on the Celebs to add a little more green pop to the grass. We used an Aadyntech Punch on a combo stand to mimic a late afternoon sun. Doug also built a masterful snoot for our Aadyntech JAB to be a spot on the box as it entered the house. Once the lighting was done and the final touches to the set were completed, it was time for the painstaking stop-motion production process. Mike served as our animator, and created a great process. I believe it is the job of the director to create freedom for the creatives; whether they are actors, art directors, or the camera department.
Production
The job of the director is to create freedom within a well defined set of restrictions. Our restrictions were the story boards, the camera moves that needed to take place, and we had to get the box down the side walk and into the house. Once the box was in the house I did not limit Mike from being creative in how he wanted to animate the box and camera. I offered my thoughts on motion and style as the process proceeded and as Mike asked for my input.
He was very meticulous in his process. He measured the length of the camera move, and the movement of the box which was approximately 13 feet. He reverse engineered from there to identify how many frames would be needed to fill our desired time frame and taped what amounted to ‘key frames’ on the wall parallel to the camera move to serve as references of when certain things needed to start and finish, such as the camera move start/stop, when the door should open, etc. The rig that Mike and Doug built up was moved into the studio. The rig had a Canon 5D Mark IV mounted to the end, and we proceeded to capture high quality RAW stills of each position. Mike literally used a ruler and moved the box one inch per frame. Some moves would feather in and out, so the distance the item was to move in-between frames would increase or decrease based on the desired effect. We were aiming for a whimsical feel to the piece, so we were not concerned with accurately representing the laws of physics, but rather doing what was fun and eye catching. In the end, Mike’s calculations were 99% accurate. It took three days to collect all of the shots. Mike assembled a rough edit at the end of each day so we could see what was created. Once completed we sent the stills off to our editor Justin to piece it all together.
Post-Production
Post-production is where all projects come to life. The post-production for this project started with compiling the photos into a video timeline so that the stills we collected depict motion. Finding the right pacing was important. Some frames were doubled up to smooth out or elongate moments. There was a bit of photoshop work that needed to make the color consistent or to remove the wires used to hang items during the photo capture process. The deliberately choppy motion especially lends itself to the quirky and whimsical tone of the video.
Music selection was also crucial for setting the right mood. I wanted to conjure the feeling of French cinema such as the work of Michel Gondry, or the classic film Amélie. We landed on an accordion heavy tune that I think fits the piece quite nicely. Justin created a sound design that helped ground the objects in the frame and combine our cartoony set with a dose of realism, to queue the viewer to the location. The graphics were the final touch, and stuck with a French new wave style with bold graphic plates that maintained our tone.
Myself and the team were really happy with the final result. If you are making a promo video for your business or for a clients, I think you should always view it as an an opportunity to get creative and explore your interests. Sometimes advertising videos get a bad-rap. They are often viewed as disingenuous or deceptive. Every project is an opportunity to illuminate a brand, a product, a process, a person, and to express yourself in a new way. This was a fun and quirky experiment that helped elucidate our shipping services. It has been well received and we may end up doing it again, but if we do it again, we will certainly add a new twist or new approach, to expand our knowledge base, and continue to evolve as creators. If you want to create a promo, and you need to help, you can click below to setup a creative consult through Perfect Circle or visit MagRents.com. Remember to always pursue your passions, and keep life in focus.
0 Comments