Sony FX9 Interview Setup, what is it?
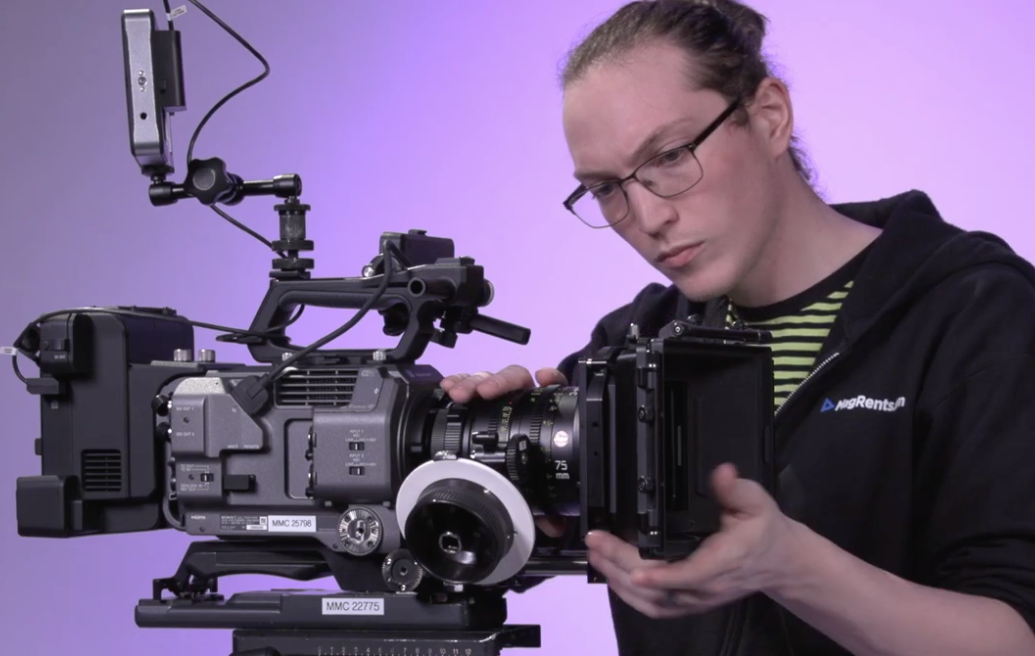
A Sony FX9 interview setup, of course, includes the Sony FX9, which is a versatile digital cinema camera for any type of production, especially documentaries. It includes an integrated shoulder pad, and extension arm for camera support and control. The FX9 can run-and-gun right out of the box. Most documentaries also include interviews, and the FX9 is built to apply its versatility to these setups as well. The camera includes a 6K full-frame sensor, so if you’re running and gunning, and your subject is moving quickly, unbalancing your composition, you can re-frame your composition in post when you descale to 4K or HD. The built-in ND helps you quickly manage the light in your environment, while maintaining your depth of field. The advanced autofocus, facial detection, and image-stabilization functionality also greatly assists the run-and-gunner. Sony’s new color space, S-Cinetone, produces pleasing facial color tones which is optimal for interviews. The camera’s dual-native ISO, and 15+ stops of dynamic range, make it an excellent low-light performer, especially if you suddenly run into an environment that shifts dark. The Sony FX9 is a great camera for documentaries and interviews. We recommend adding several accessories to this camera, to make your production easier, and provide even more versatility.
Gear List for Sony FX9 Interview Setup (0:55)
- Sony PXW-FX9 XDCAM Body Kit
- Leitz Summicron T2.0 75mm Lens
- Metabones PL to E Mount Adapter for Sony NEX
- SmallHD 702 Bright Monitor Kit
- Arri MMB-1 Mattebox Bundle for Sony FX9 (ask a rental coordinator)
- VCT Quick-Release Tripod Adapter (included in the mattebox bundle)
- Black Pro Mist 4×5.65 1/4 Filter
- Filmtools Camera Cart
- Sachtler V20 S1 Tripod Kit
The Leitz 75mm lens is slightly telephoto which helps separate the focus on an interview subject from the background. The lens is also color-neutral, and tack sharp edge-to-edge so it will take advantage of the FX9’s virtues. The SmallHD 702 monitor’s user interface functions as a page system, which makes it fairly easy to customize multiple control options, and then easily access these controls. The Arri Mattebox Bundle includes an Arri Adapter Plate to adapt a VCT Quick-Release Tripod Adapter for quick on-and-off movement from tripod-mounted interview setups, and then back to run-and-gun shoulder rig shooting. The mattebox includes two 4×5.65 filter trays for greater image control. The Black Pro Mist 4×5.65 filter provides an additional layer of versatility as it evens out the highlight roll-off in our image, adding a slight and soft haze to further control and balance facial skin tones.
Gear List for Audio
The multiple audio recording devices diversify your audio capture, and record more frequencies, with varying sonic ambience, to produce higher quality audio.
Gear List for Power
The FX9 Extension Kit provides a V mount adapter for powering the camera and accessories. The unit’s P-tap output provides a power connection to the SmallHD 702 monitor which uses the 2pin LEMO cable and power adapter included in the monitor kit to draw power.
How We Build the Interview Setup (9:00)
- Remove the shoulder pad plate from the bottom of the Sony FX9.
- Mount the Arri Adapter Plate to the bottom of the FX9.
- Mount the LCD Monitor to the camera.
- Connect the Metabones lens adapter to the camera’s lens mount.
- Mount the Leitz 75mm lens to the Metabone adapter.
- Insert the 15mm rails included in the Mattebox Bundle into the Arri Adapter Plate.
- Remove port cover on the top-rear of the camera that covers the connector for the extension unit.
- Connect the extension unit to the back of the camera.
- Connect the Sachtler tripod’s quick release plate to the VCT Tripod Quick Release Plate included in the mattebox bundle.
- Mount VCT Tripod Quick Release Plate to the tripod’s fluid head.
- Mount the camera system to the VCT plate on the fluid head.
- Thread an articulating arm into the 702 monitor, then thread the other end into the camera body.
- Connect the monitor’s P-tap Adapter to the 2pin LEMO cable, mount the adapter to the monitor, and connect the P-tap connector to the P-tap output on the extension unit.
- Mount the Arri Follow Focus if you are not using auto-focus.
- Mount the mattebox to the 15mm rails and secure the mattebox’s reduction ring around the front of the lens.
- Insert the Black Pro Mist filter.
- Mount a V mount battery to the extension unit.
- Mount and connect the lav kit’s receiver to the camera body.
- Setup a C-stand with the Boompole Holder, Boompole and shotgun mic.
- Connect the shotgun microphone to the camera’s XLR port with one of the included XLR cables.
- Power on all devices.
- Adjust audio settings and levels as needed.
- Adjust lighting on set as needed. (check out our 3-point lighting setups for interviews with our post LED Lighting Kits)
- Adjust camera settings as needed.
- Lights, camera, action!
Setup up a free consultation, or go to magrents.com to build a rental order!
0 Comments