
Panasonic Varicam LT, what makes it a great camera?
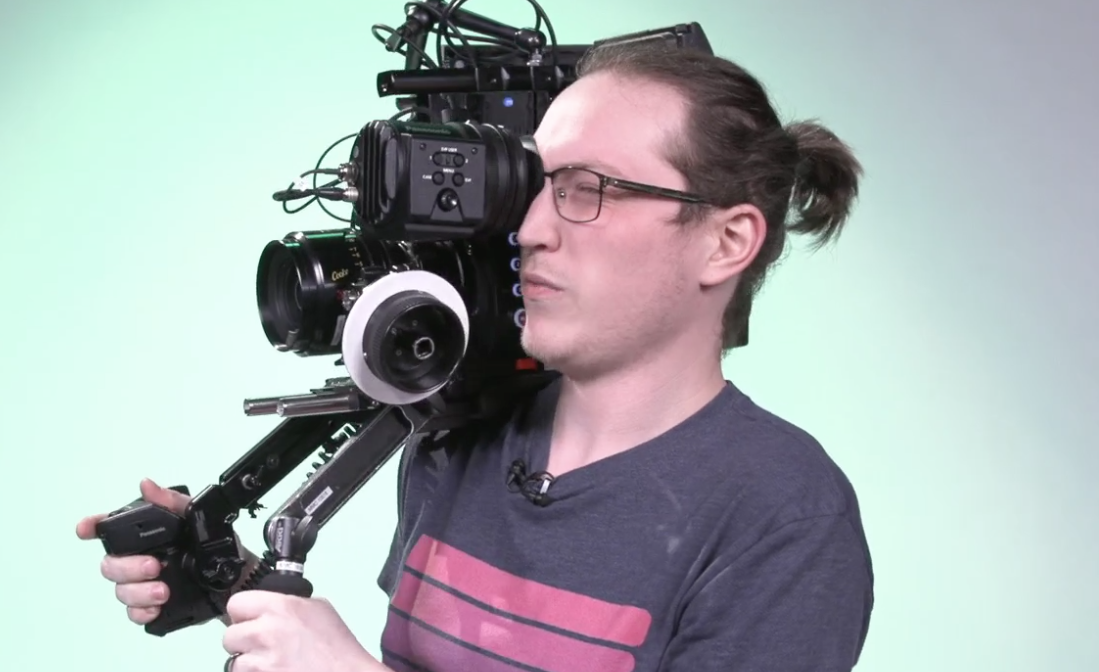
The Panasonic Varicam LT digital cinema camera, follows current industry camera design, while exceeding specifications. The camera boasts a dual-native ISO of 800, and for low-light performance, an ISO of 5000, which exceeds similar camera types such as the Sony FX9. The Varicam LT, while maxing out at around 14 stops of dynamic range while shooting in V-log, can record a 4K resolution at 60 frames per second, but also 2K, at an exceptional 240 frames per second. Our camera kit includes just about everything you need to start shooting. It includes a shoulder mount, an EVF, and an extension arm for shoulder rig setups. The shoulder mount is designed to attach to a quick-release tripod adapter for swift adaptation to a studio build, and then back to a shoulder rig. The kit includes an Anton Bauer Gold Mount Battery Package to power the camera and accessories. It also includes P2 media to record your high-resolution video, and an SD card to record your proxy video. The Varicam LT also pairs well with the Panasonic AG-EVA1 Cinema Camera for multi-camera productions that need a budget-friendly B-roll camera or two. A few gear additions gets the Panasonic Varicam LT shooting, and even more adaptable to a variety of productions.
What Gear Are We Using? (0:39)
- Panasonic VariCam LT 4K S35 Body Kit
- VCT Quick-Release Tripod Adapter
- (2) 15mm rods (ask a rental coordinator!)
- Cooke Mini S4 T2.8 32mm Lens
- TV Logic VFM-058W 5.5″ Field Monitor Kit
- Arri Handgrip extension
- Arri Hand Grip
- Arri MFF-2 Cine Follow Focus
- Sachtler V20 S1 Tripod Kit
The Cooke Mini S4 lens gives you that “Cooke look”. The Cooke look is a soft capture of highlights and rich colors, which provides a reduced need for additional filtration, or color grading in post-production, depending upon what you’re trying to achieve. The TV Logic monitor provides very good brightness for monitoring your video in outdoor or bright environments, when you’re mounted to a tripod, and prefer a larger screen than the EVF provides. The additional Arri hand grip and Arri handgrip extension mounts parallel to the kit’s included hand-grip module for optimal shoulder rig support. The Arri follow focus is the perfect manual lens control device for 15mm rod configurations. Finally, the trusted Sachtler V20 S1 tripod is more than capable of supporting the weight of the Varicam LT and all of its accessories.
How Do We Build this Setup? (5:01)
- Attach the tripod’s quick release plate to the VCT Quick-Release Tripod Adapter.
- Mount the VCT adapter to the Sachtler V20 S1 fluid head.
- Insert a pair of 15mm rods into the shoulder mount unit.
- Mount the camera to the shoulder mount unit.
- Mount the camera system to the VCT adapter on the tripod.
- Mount the camera’s control panel to the swivel mount on the top-rear of the camera.
- Connect the control panel’s cable to the corresponding port on the rear of the camera.
- Mount the EVF to the camera’s EVF adapter.
- Connect the included SDI cable to the EVF, and the video output on the front of the camera.
- Connect the included EVF power cable to the EVF, and the power output on the front of the camera.
- Thread the articulating arm included in the TV Logic Monitor Kit to the top handle of the camera.
- Thread the other end of the arm into the TV Logic monitor. We recommend threading it to the side of the monitor. (10:43)
- Connect an included SDI cable to the SDI input on the monitor, and the output on the camera.
- Connect the included P-tap power cable to the monitor, and the P-tap output on the gold mount battery adapter on the back of the camera.
- Attach the Varicam Grip Module to the rosette on the shoulder mount unit.
- Connect the grip module cable to the side of the camera.
- Attach the Arri handgrip extension and hand grip to the other rosette on the shoulder mount unit.
- Mount the lens to the camera, and make sure the lens mount is locked.
- Mount the Arri follow focus to the 15mm rods.
- Mount a gold mount battery to the camera’s battery adapter.
- Insert media, and power on the camera and accessories.
- Lights, camera, action!
Setup up a free consultation, or go to magrents.com to build a rental order!
0 Comments